The original photo of the church has a lot of clutter that needs to be removed: telephone lines criss-crossing the beautiful clouds and blue sky and a car parked in front.
My first challenge was to remove the telephone lines. ( Methods explained in
previous post.)
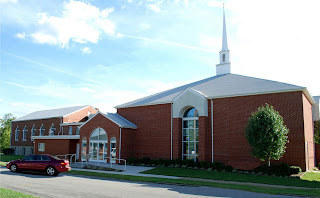
As my son would say, "Just for the LOLZ" I moved the car down the street. Basic steps: duplicate original layer, use move tool to place it down the street, trnasform tool to resize and distort to look natural in the perspective, duplicate the resized car, select the layer for the resized car go to EDIT>FILL... select 50% gray, rename layer shadow, use transform options to orient the shadow. I also used FILTER> Motion Blur to smooth out jagged edges of shadow shape. Last I created an elipse, filled with black #000000 for the darker shading under the car. (I used the original car as model) Last of all, I selected the moved car and desaturated to give it the effect of distance.
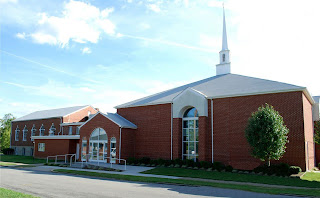
Here's the last revision removing the car completely! I used a combination of techniques to get rid of the car and create a landscape in its place. This was extremely complicated, because of so many elements with different textures colors and shapes. I duplicated the car so the original wouldn't be destroyed in the process. I selected the car with the Magnetic lasso, then began the painstaking long tedious all night task of using the Clone Tool (Stamp Tool PS-CS4) to select, copy and stamp a thousand sections into the area of the selected car. After deselecting the car there were still areas outside of the selection that need to be edited. I used the Vanishing point techniques to create several panes for the finishing the details of the landscaping. I used one pane for the road to extend the shadow left behind. I used panes for the different shades of grass and extended the dark shaded grass to the end of the photo over the sunlit grass so the foreground would be the same. I got very detailed by using separate panes to build up the flower bed and extend corners of the landscaping logs on the corner of the building. Obvious the shadowing is not accurate to the laws of light & perspective, but it looks natural enough.


 ShareThis


